
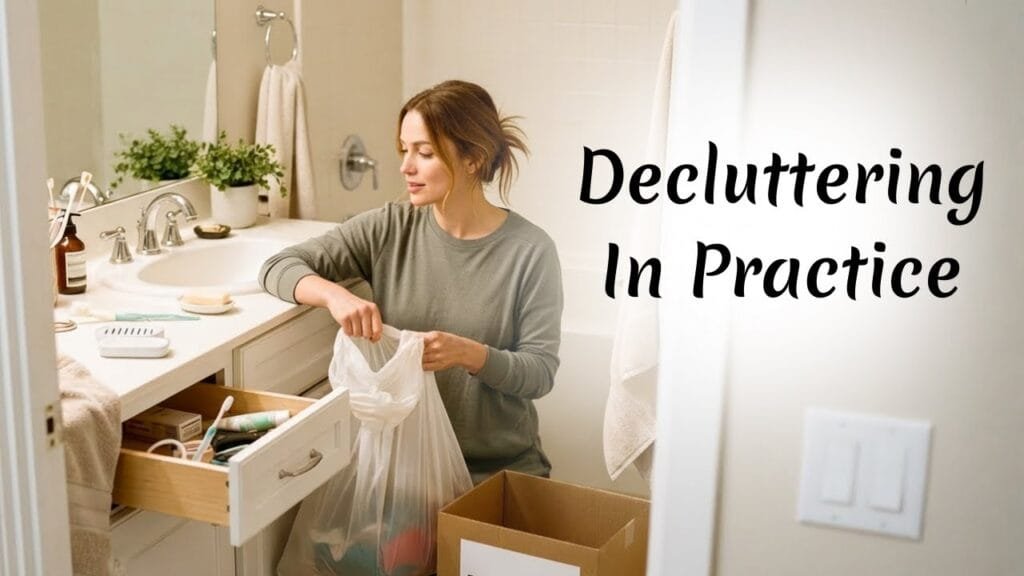

Sometimes the hardest part of decluttering isn’t knowing you should do it. It’s knowing how to begin without turning the whole house upside down. That’s where a little practical life advice for women makes such a difference. Not grand plans. Not color-coded perfection. Just clear next steps you can actually use in a real home, with real shelves, real products, and real life happening in the background.
If you’ve ever stood in front of a pantry stuffed with half-used boxes, or opened a bathroom drawer full of expired products and thought “I don’t even know where to start,” this one’s for you. The good news: decluttering doesn’t have to begin with a shopping trip or a big makeover. It begins with decisions.
The short answer
Decide your goal first, set up your trash and donation spots, start by pulling out the obvious trash, then work through one small area at a time. Don’t organize yet, don’t buy containers yet, and don’t try to do everything at once. Pantry, bathroom, closet, or drawer, the same basic process works: clear out what’s expired, broken, unused, or no longer fits your life, and let the categories form naturally as you go.
Why decluttering feels so hard
Most of us don’t struggle because we’re lazy or bad at organizing. We struggle because decluttering asks for decisions, energy, and follow-through, and it stirs up a lot of everyday feelings: guilt about wasted money, frustration over things nobody used, decision fatigue, overwhelm about where to begin, and the pull to start organizing before you’ve actually decluttered. So this needs to be gentle and realistic. You don’t have to do it perfectly. You just need a way in.
Do the pre-work before you touch a shelf
A few decisions made in advance take the pressure off every decision after, because you’re not figuring out the whole system on the spot.
Decide where things will go. For a pantry, that’s usually trash for expired or unusable food, a “use it now” bin for food you insist on keeping even though it’s close to date, and donation for unopened items you no longer want. For a bathroom, most things head to the trash, especially anything opened, expired, or unsanitary. Unopened, still-usable items may suit a women’s shelter, but only if they’re genuinely appropriate to give.
Decide why you’re doing it. Your “why” becomes the filter for every choice. Maybe you want better food management, easier access to daily items, healthier food front and center, a lunch-packing station, or a bathroom that feels lighter and easier to clean. When your life changes, your spaces need to catch up. That’s normal.
Gather supplies first. One big reason decluttering stalls is stopping halfway to hunt for bags or a place to put stray things. Have a real trash can with a bag in it, a donation box, a laundry basket for items that belong elsewhere, and a staging surface if you need one. In a pantry, a table holds bulky items while you clear a shelf. In a bathroom, an empty shipping box corrals small things so they don’t roll everywhere.
Set a realistic time goal. Fifteen minutes is plenty, and you can keep going if you’ve got the energy. Short sessions are often what builds momentum. A finished 15-minute session feels better than a two-hour project that leaves the room worse than you found it.
How to declutter a pantry, step by step
The pantry is a great teaching space because the decisions are usually clear: food is expired, stale, unwanted, or useful. It can also be tiring, so go in with a plan. Start by taking a before photo. It’s a small thing, but it gives you a way to see your progress when the changes feel tiny in the moment.
Then start with obvious trash rather than the hardest calls. Train your eye on what clearly needs to go: expired food, stale chips or cookies, nearly empty bags with crumbs at the bottom, empty jars or lids, loose packaging and grocery bags. If anything is piled on the pantry floor, clear that early. It’s easier to reach, and a cluttered floor makes a space feel more stressful than it really is.
Next, pick one easy shelf or category, something with a natural grouping already, like cereal, canned goods, or pasta. Work only that area. Toss the expired, pull the foods no one eats, donate unopened items that no longer fit your habits, and gather similar things loosely together. Notice that word, loosely. You’re not organizing yet, just letting categories emerge while you declutter. Then repeat shelf by shelf:
- Remove trash
- Pull out the easy clutter
- Donate usable items you no longer want
- Set aside anything that belongs elsewhere
- Let rough categories gather naturally
A laundry basket is perfect for things that wandered into the pantry and need rehoming later. Batteries, random household supplies, and all kinds of odd little objects seem to end up there. One bit of practical life advice for women that sounds small until you’re hauling a ripping bag of cans: watch the weight of your trash. Pantry trash gets heavy fast. Several easy trips beat one difficult one, and half-filled bags you can safely lift beat overstuffed ones that split. If you’re clearing a lot of canned goods, pace yourself and spread it over a few trips or a few days.
Work with your energy, not against it. Pantry work involves bending, reaching, and lifting heavier things than people expect. If you’re low on energy, choose lighter shelves or sit on a stool where you can. If you need help with high shelves or heavy bags, wait for it, and please use a real step stool or ladder rather than climbing the shelves or balancing on something wobbly. No pantry project is worth a fall.
What should the pantry look like when you’re done? Not perfect. Not beautifully containerized. Just lighter. By the end of decluttering, it should hold mostly the foods you actually eat, in rough categories, with some breathing room. That breathing room matters, because it leaves space to think clearly later about organizing, seasonal stocking, or stations that fit your household.
How to declutter a bathroom, step by step
Bathrooms are a different animal. The items are smaller, the categories messier, and the guilt runs surprisingly deep. Expensive beauty products, half-used lotions, samples, hotel soaps, broken makeup, and “maybe someday” items pile up fast. Start with your outcome in mind: easier cleaning? Easier access to everyday products? Less visual clutter first thing in the morning? A better sense of what you’re actually running low on? A bathroom that fits your life and body as they are now? That answer guides what stays.
Give yourself grace about money already spent. This might be the most important bathroom mindset shift. Sometimes a product just doesn’t work for you. Sometimes it was a gift, or a sample, or it worked for a while and now it doesn’t. None of that means you have to keep punishing yourself by storing it another year. If you don’t like it, don’t use it, or it’s expired, you’re allowed to let it go.
A whole bathroom can feel like too much, so pick one zone: the shower, one drawer, the vanity shelves, the linen closet floor, or the countertop. That’s enough for the day. Then start with trash and the floor, tossing the nasty lotion, the dried-out makeup, the old razor, the product you know you dislike, and whatever’s sitting on the floor. In a linen closet especially, clearing the floor first makes the rest safer and easier.
Once the obvious trash is gone, move to the easy decisions: broken or dried-out makeup, products you stopped using, hotel soaps you never reach for, ancient samples, and anything that doesn’t belong in the bathroom at all. Keep a laundry basket nearby for the rehome items. Because bathroom things are tiny and slippery, an empty shipping box makes a great holding spot while you sort, keeping the “keep” items together without asking you to organize them yet. As you empty a drawer, move fast: toss the old mascara, keep the new one, toss the dried eyeliner, keep what you actually use.
If there’s a product you still want to try, don’t drop it back into the general clutter. Put it in a small, visible bin on the counter and give yourself a short testing window, a week or two, one item at a time. If you don’t like it, toss it right away. Then work drawer by drawer and shelf by shelf, across the countertop, the back of the tank, and the tub edge, keeping the same sequence the whole way: trash the obvious, remove easy clutter, set aside rehome items, keep only what you use or want, and resist the urge to organize.
Common mistakes to skip
- Buying bins before you know what you’re keeping
- Starting to organize instead of declutter
- Carrying items to other rooms mid-project
- Making trash bags too heavy to lift safely
- Trying to do the whole space in one exhausting session
This is steady work, not dramatic work. That’s usually why it lasts. And you don’t need to worry yet about matching containers, shelf risers, drawer dividers, or rolling carts. Jot down ideas if you like, but this isn’t the time to buy anything. Decluttering first gives you the space and clarity to organize well later. Organizing before decluttering just shuffles too much stuff into prettier containers. When you’re ready to buy, here’s how to choose bins and containers that actually work.
Quick-start checklist
- Take a before photo
- Choose one small area only
- Set a 15-minute timer
- Bring a trash can, donation box, and rehome basket
- Start with the floor if needed
- Remove obvious trash first
- Remove easy clutter next
- Gather similar items loosely together
- Stop before you’re exhausted
- Don’t buy organizing products yet
Why this works in any room
The pantry and bathroom make it easy to picture, but the principles carry almost anywhere: closets, drawers, garages, linen cupboards, utility shelves, whole rooms. The room changes; the sequence barely does. Decide your purpose. Set up the exit routes for items. Start with trash. Work one small area at a time. Declutter before you organize. That’s what makes this kind of practical life advice for women so useful, it takes the mystery out. You don’t need a special talent for this. You need a repeatable process. If you want to go deeper on the mindset side before your next space, my declutter like a pro guide is a good next step, and there’s a free organizing quick-start guide to keep nearby while you work. And when the space is clear and you’re ready to build systems, organizing after decluttering picks up right there.
FAQ
How do I start decluttering when I feel overwhelmed?
Start with one very small area and look only for trash first. A 15-minute session is enough to build momentum without creating a bigger mess.
Should I organize my pantry while I declutter it?
No. Declutter first. You can loosely gather similar foods together, but full organizing should wait until you know what’s staying.
What should I do with expired pantry items?
Trash them, don’t donate them. If you insist on keeping something, set it aside in a visible “use now” bin and make a plan to use it soon.
Can I donate bathroom products?
Only unopened, unexpired, sanitary products should be considered. Opened or questionable items should go in the trash.
Why am I told not to buy bins yet?
Because containers don’t solve clutter. Buy them too early and you may end up organizing things you don’t even need to keep.
How long should a session be?
Fifteen minutes is a solid starting point. Keep going if you feel energized, but shorter sessions are usually easier to finish consistently.
What if I feel guilty throwing away expensive products?
That guilt is common, especially in bathrooms. But keeping a product you dislike doesn’t recover the money. Letting it go makes room for what actually serves you.
A gentle closing thought
Decluttering doesn’t have to begin with a burst of motivation or a perfect weekend. It can begin with one shelf, one drawer, one trash bag, and one honest decision. That’s the kind of practical life advice for women that holds up in real life. Start small. Keep it simple. Let the space get lighter before you ask it to get prettier.
If you’d like more useful help with organizing and everyday life, come join the Life A-Go-Go newsletter for practical ideas, video updates, and our private live-session information. And if this landed at the right time, the video is a warm companion while you work through your own space. Keep going, friend.